Complete Guide to Apple Health: Managing Your Health on Apple
Maybe you have in your hands a powerful tool to manage your health and you don’t even know it exists!
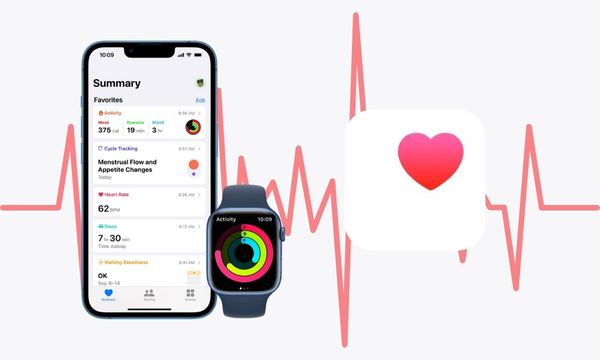
Apple Health is one of the most in-depth and useful built-in apps designed for iOS users. The platform has an intuitive and friendly interface, full of interesting features that help you track and monitor activities and health information on a daily basis.
You will be redirected to another website
One of the main advantages of Apple Health is that the user can have all the information in one place! This helps a lot, especially those people who don’t understand much about technology.
Even though Apple Health is an easy-to-use app, due to its wide variety of features, it may seem a little complex at first. But that doesn’t stop you from using it. In this article you will find a complete guide with everything you need to know to start managing your health on Apple. Follow along!
Main sections of the application
Before you start exploring Apple Health’s main features, it’s important that you know that the app has three main sections: Summary, Sharing and Browse.
In the Summary section you will find a summary of the steps, sleep and other data being monitored. You can also access general trends and graphs. In this section you can activate notifications and configure your medical identification.
In Sharing, you can share the health data recorded in the app with other people, such as friends, family and even your doctor.
And finally, in Browse, you can find health categories, such as body measurements, hearing and heart. Your vital signs and symptoms of various health complications can also be added to the section.
With this basic understanding of what you can find in Apple Health, let’s start exploring a little more how to take advantage of all the available features and get the most out of them.
You will be redirected to another website
What can you to monitor using Apple Health?
As we can see, Apple Health has several features available, however, not all of them are used frequently. If you want information about everything the app allows you to monitor, you can access the Browse section and check the complete list. Below we will look at some of the most common data that users monitor.
To begin with, we have the Activity section which allows you to record your physical activity, including distance covered, steps, among others. This is certainly one of the most used features, as the app automatically records and stores the values for later consultation.
It is also possible to record different body measurements, such as hearing, respiratory and cardiac measurements. In addition to blood pressure and blood oxygen, the first is very useful for hypertensive people.
Likewise, anyone who wants to opt for a better lifestyle can start by monitoring their nutrition and sleep quality. When it comes to sleep, you can even set sleep goals. Regarding nutrition specifically, users can record nutrients, such as iron, cholesterol, fiber and proteins, for example.

Apple Health Source: (Canva)
How to add health data
The beauty of Apple Health is that it knows very well what it should track. Some features, such as steps, sleep and audio levels from headphones, the app can register automatically using data from sensors and other accessories on your device.
Therefore, there is no need to activate anything or register values. You just need to open the app and you will see how all the data has already been added and updated for you!
However, these measurements can become more accurate if recorded using an Apple Watch. Therefore, you can set up sleep monitoring using your Apple Watch and receive complete reports every morning. Other features must be added manually, such as cholesterol levels, blood pressure, blood oxygen, etc. Here’s how to record this data:
- Click on the category you want to add data to. You can search in the Browse section.
- Select “Add data” in the top right corner of the screen.
- Then, add the data you want and click “Add” or “Done”.
How to view and use tracked data
Once you have recorded all the data, it becomes easier to view and use it according to your needs. If you need to use certain data frequently, you can place it in Summary by following the steps:
- Open the Summary section.
- Press “Edit” in the Favorites row.
- Check the resource you want to view in the Summary section.
- Click “Done”.
Likewise, if you want to see all tracked data in one place, go to “Show all health data on Summary page”. Therefore, everything recorded automatically and manually can be found there.
The app also allows you to activate trend notifications. If by chance there is a deviation from the average trend or there is a significant drop or increase in a certain value, you will be notified immediately. To activate this option, simply tap your profile photo in the Summary section and click “Notifications”.
How to set up a medical ID
This setting can save your life in the face ofan emergency medicaland should be one of the first things you do when you start using Apple Health. See below how to configure it:
- Go to the Summary section.
- Click on the icon in the upper right corner and select “Medical record”.
- Press “Edit” to add or change details.
- Add all necessary information, including emergency contacts.
- Be sure to turn on “Show” when locked so that your medical ID can be viewed by emergency personnel even if yourdevice is blocked.
Conclusion
Now that you know this betterinnovative iPhone app, you can take a much more active part in managing your health. With this wide range of resources it is possibleto improve your lifestyle and your health.
Monitor vital signs, read informative articles, and share your health data with anyone you want, all in the same app. Get started now and take advantage of everything Apple Health has to offer.
 Exercises for High Blood Pressure: Apps to Start Your Workouts
With the right apps, exercises for high blood pressure become easier and safer. Controlling blood pressure is […]
More Improve Your Sleep Quality with 3 Useful Apps: Practical Tips
Transform your sleep quality with the help of technology! The quality of sleep plays a crucial role […]
More Organize Your baby meals with These 3 Apps
Transform organizing your baby meals into a simpler and more practical task with the help of incredible […]
More